User Guide – How to Unlock and Lock Encrypted Drives using tCrypt2Go or vCrypt2Go
This is an article for users illustrating how to unlock and lock drives encrypted for use with tCrypt2Go for TrueCrypt Portable (also applicable to vCrypt2Go for VeraCrypt unless otherwise specified) on PC and Mac.
(This is a sub-article – click here to view to the list of articles or the main article of tCrypt2Go and vCrypt2Go)

a. Insert portable drive (encrypted according to tCrypt2Go/vCrypt2Go configuration guide)
Then go to [Start] > Computer.

b. Double-click drive with the label UNPROTECTED
× Reminder: It may not always be named UNPROTECTED; it can also be “Local Disk” or anything.
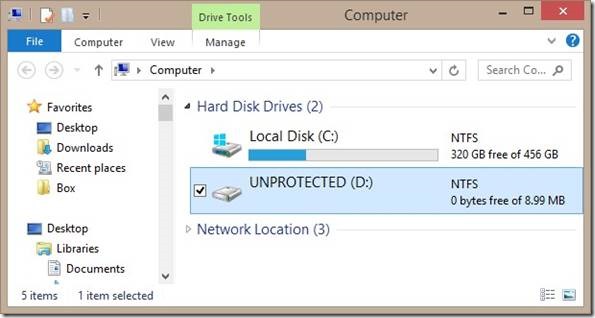
(This is unencrypted area, hence available space is 0 byte. Do not attempt to store anything.)
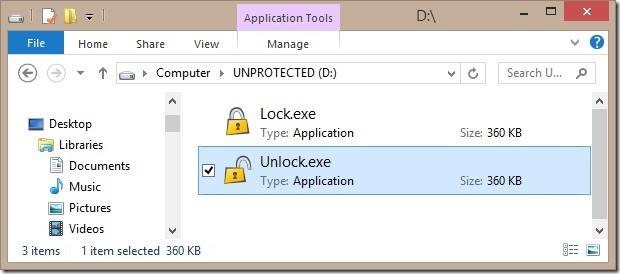
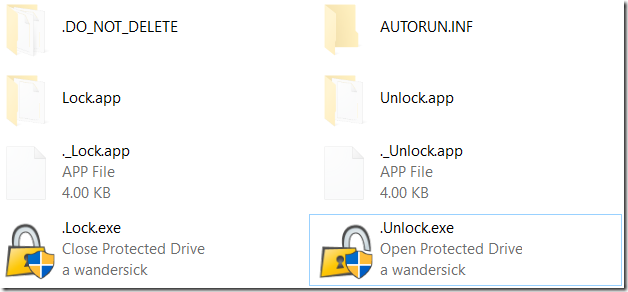
c. Double-click “.Unlock.exe” to unlock protected area.
d. Enter TrueCrypt/VeraCrypt password to unlock protected area.

e. If successful, an additional drive, usually named PROTECTED, will be mounted and prompted.
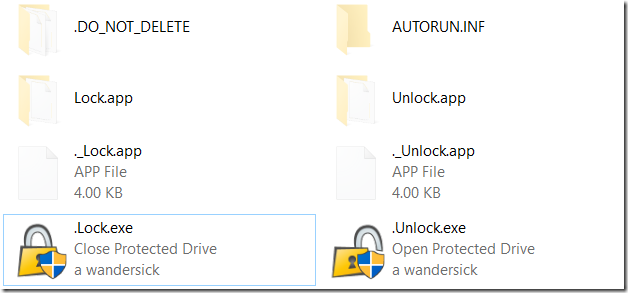
After use, double-click “.Lock.exe” to lock the drive.

a. Insert portable drive (encrypted according to tCrypt2Go/vCrypt2Go configuration guide).
Then go to [Start] > Computer.

b. Double-click drive with the label UNPROTECTED
× Reminder: It may not always be named UNPROTECTED; it can also be “Local Disk” or anything.

(This is unencrypted area, hence available space is 0 byte. Do not attempt to store anything.)
c. Execute “.Unlock.exe”

d. If there are no admin rights and on first-use, user will be prompted to install TrueCrypt/VeraCrypt
Press OK and continue with TrueCrypt installation. (If required, acquire approval from IT.)

Note: If TrueCrypt or VeraCrypt is already installed/admin rights are available (no need for installation)
If not first-use, please skip the next few steps.
e. Installation method of TrueCrypt (similarly for VeraCrypt) will be introduced as follows.
After clicking OK, a File Explorer window will be prompted, in which “TrueCrypt Setup.exe” or “VeraCrypt Setup.exe” will be presented for installation. Double-click it.

Note: In addition, TrueCrypt and VeraCrypt installers can be acquired respectively from:
- http://www.truecrypt71a.com and http://www.veracrypt.fr
f. Enter admin credentials
× Reminder: The below window may not be presented in some Windows systems, such as Windows XP or later Windows versions with UAC disabled.

g. Check “I accept the license term” to accept end-user licensing agreement. Click Next.

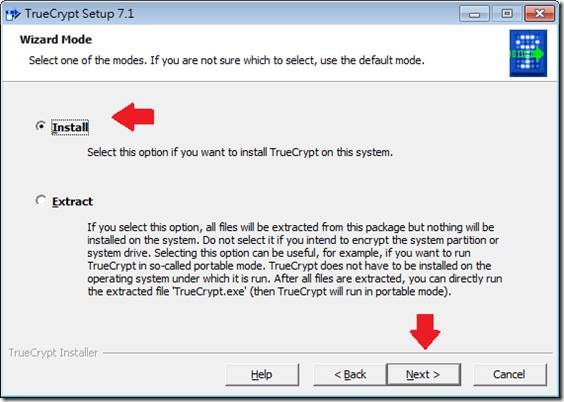
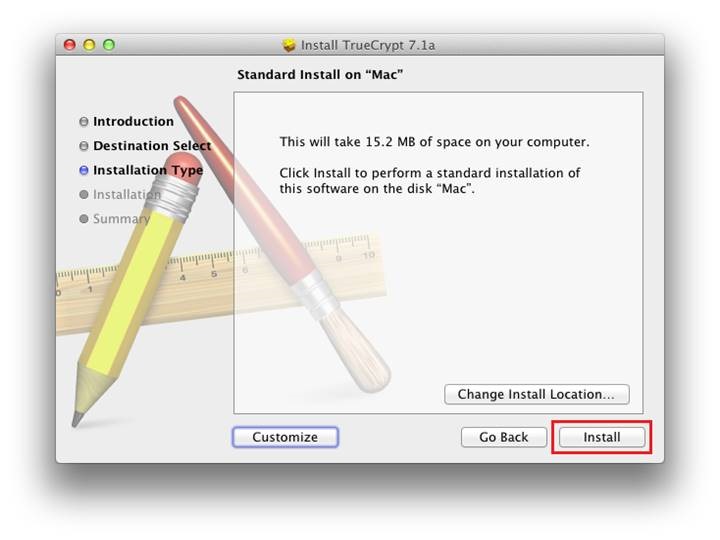
h. Select Install and click Next to begin installation on the current computer.
i. Click Install.

j. When installation is complete, click Finish.

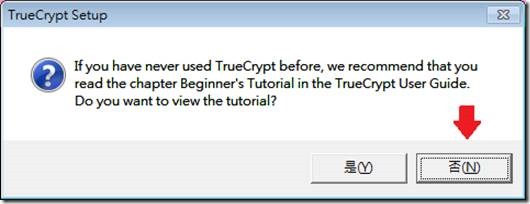
k. Click No to skip tutorial (if prompted).
l. Now, with TrueCrypt/VeraCrypt installed, we can unlock protected area by double-clicking “.Unlock.exe”
m. Enter TrueCrypt/VeraCrypt password to unlock protected area

n. If successful, an additional drive, usually named PROTECTED, will be mounted and prompted.

Now the encrypted data in the protected area can now be accessed. Feel free to read or write there and your data will be encrypted.
o. After use, double-click “.Lock.exe” to lock the drive.
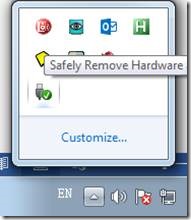
p. To safely remove the USB device, go to the tray area and perform “Safely Remove Hardware…”.
× Note: For Mac OS X, it is optimal if TrueCrypt is installed. (For TrueCrypt encrypted partition, this is a must; for TrueCrypt container, it is still recommended to install TrueCrypt.)
× Reminder: Under default configuration, Mac OS X can only read but not write to NTFS file systems; if write is required, please format your portable drive as FAT32 or exFAT according to configuration guide.
a. Insert portable drive (encrypted according to tCrypt2Go/vCrypt2Go configuration guide). Run Finder.
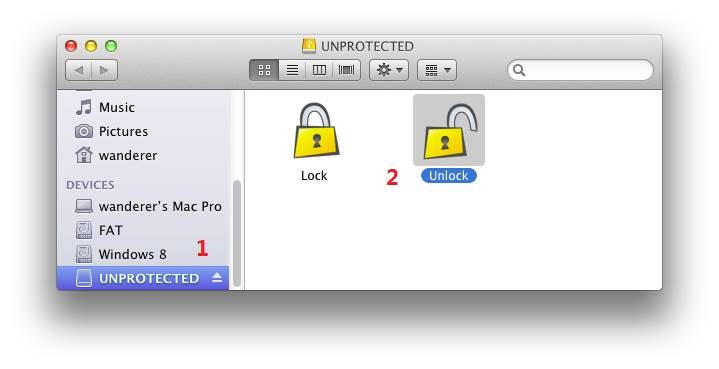
 b. Click the volume on the left pane (usually named UNPROTECTED) [1]; execute “Unlock” on the right. [2]
c. On first use, a message like the below will be prompted. Click OK to install TrueCrypt or VeraCrypt. (If required, acquire approval from IT.)

Note: Mac OS X behaves differently from Windows, where TrueCrypt must be installed in order to mount encrypted partitions (not encrypted containers) even if admin privileges are available
× If this is not the first time of use, or TrueCrypt/VeraCrypt is already installed, skip to Step 11
d. Installation method of TrueCrypt (similarly for VeraCrypt) will be introduced as follows.

After clicking OK, another Finder window will be prompted, presenting the installer. Double-click the installer.
× In addition, TrueCrypt and VeraCrypt installers can be acquired respectively from:
- http://www.truecrypt71a.com and http://www.veracrypt.fr
e. Click Accept to accept the end-user licensing agreement.
 f. Double-click the installer presented.

g. Click Continue to continue installation.

h. Click Install to begin installation.
i. Enter admin credentials.

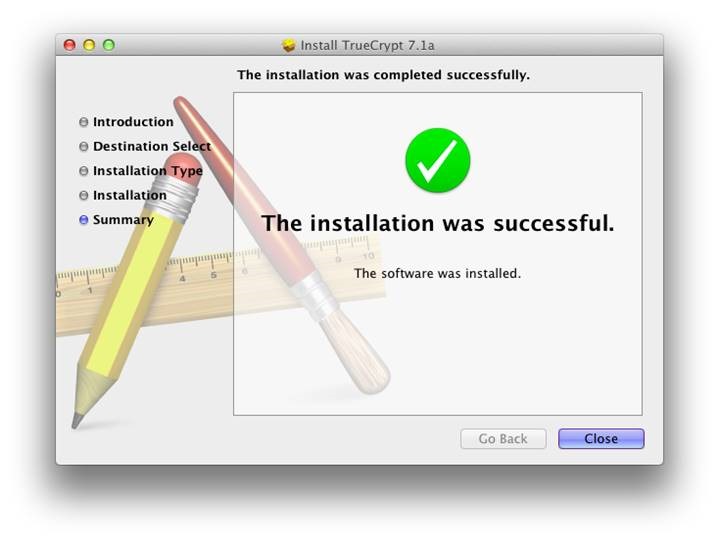
j. When done successfully, click Close to exit.
k. Now, with TrueCrypt/VeraCrypt installed, we can unlock protected area by double-clicking “Unlock”.
In Finder, click UNPROTECTED on the left pane [1]; click Unlock on the right. [2]
l. Enter TrueCrypt/VeraCrypt password to unlock protected area.

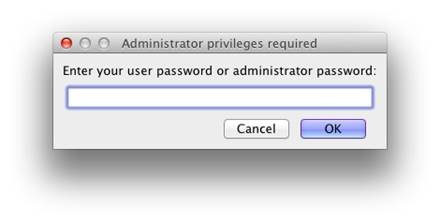
m. If the below “administrator privileges required” dialog is prompted, enter the admin password.
n. In case TrueCrypt/VeraCrypt fails to obtain administrator privileges, you may (ask an IT admin to) refer to “Granting Non-Admin Mac Users TrueCrypt/VeraCrypt Right (by Editing /etc/sudoer)” section in the configuration guide.

o. Now, try accessing data in the encrypted area.
Execute Finder again. There will be an additional partition on the left (usually named PROTECTED). Double-click the drive. Feel free to read or write there and your data will be encrypted.
× Reminder: Under default configuration, Mac OS X can only read but not write to NTFS file systems; if write is required, please format your portable drive as FAT32 or exFAT according to configuration guide.
p. After use, double-click “Lock” to lock the protected area. Before unplugging device, click the icon on the left.

q. At times, the below warning is prompted after unplugging device. Click Ignore.

(This is a sub-article – click here to view to the list of articles or the main article of tCrypt2Go and vCrypt2Go)
Topics Covered in this Article
- Unlocking and Locking Encrypted Drives with tCrypt2Go – Admin User Guide – PC
- Unlocking and Locking Encrypted Drives with tCrypt2Go – Admin User Guide – Mac
- Unlocking and Locking Encrypted Drives with tCrypt2Go – Standard User Guide – PC
- Unlocking and Locking Encrypted Drives with tCrypt2Go – Standard User Guide – Mac
1. Unlocking and Locking Encrypted Drives with tCrypt2Go – Admin User Guide – PC
In this section, the method for unlocking encrypted portable drive with administrator privileges under Windows is introduced.a. Insert portable drive (encrypted according to tCrypt2Go/vCrypt2Go configuration guide)
Then go to [Start] > Computer.
b. Double-click drive with the label UNPROTECTED
× Reminder: It may not always be named UNPROTECTED; it can also be “Local Disk” or anything.
(This is unencrypted area, hence available space is 0 byte. Do not attempt to store anything.)
c. Double-click “.Unlock.exe” to unlock protected area.
d. Enter TrueCrypt/VeraCrypt password to unlock protected area.
e. If successful, an additional drive, usually named PROTECTED, will be mounted and prompted.
After use, double-click “.Lock.exe” to lock the drive.
2. Unlocking and Locking Encrypted Drives with tCrypt2Go – Admin User Guide – Mac
See Section 4, i.e. the Standard User Guide for Mac.3. Unlocking and Locking Encrypted Drives with tCrypt2Go – Standard User Guide – PC
In this section, the method for unlocking encrypted portable drive under Windows is introduced.a. Insert portable drive (encrypted according to tCrypt2Go/vCrypt2Go configuration guide).
Then go to [Start] > Computer.
b. Double-click drive with the label UNPROTECTED
× Reminder: It may not always be named UNPROTECTED; it can also be “Local Disk” or anything.
(This is unencrypted area, hence available space is 0 byte. Do not attempt to store anything.)
c. Execute “.Unlock.exe”
d. If there are no admin rights and on first-use, user will be prompted to install TrueCrypt/VeraCrypt
Press OK and continue with TrueCrypt installation. (If required, acquire approval from IT.)
Note: If TrueCrypt or VeraCrypt is already installed/admin rights are available (no need for installation)
If not first-use, please skip the next few steps.
e. Installation method of TrueCrypt (similarly for VeraCrypt) will be introduced as follows.
After clicking OK, a File Explorer window will be prompted, in which “TrueCrypt Setup.exe” or “VeraCrypt Setup.exe” will be presented for installation. Double-click it.
Note: In addition, TrueCrypt and VeraCrypt installers can be acquired respectively from:
- http://www.truecrypt71a.com and http://www.veracrypt.fr
f. Enter admin credentials
× Reminder: The below window may not be presented in some Windows systems, such as Windows XP or later Windows versions with UAC disabled.
g. Check “I accept the license term” to accept end-user licensing agreement. Click Next.
h. Select Install and click Next to begin installation on the current computer.
i. Click Install.
j. When installation is complete, click Finish.
k. Click No to skip tutorial (if prompted).
l. Now, with TrueCrypt/VeraCrypt installed, we can unlock protected area by double-clicking “.Unlock.exe”
m. Enter TrueCrypt/VeraCrypt password to unlock protected area
n. If successful, an additional drive, usually named PROTECTED, will be mounted and prompted.
Now the encrypted data in the protected area can now be accessed. Feel free to read or write there and your data will be encrypted.
o. After use, double-click “.Lock.exe” to lock the drive.
p. To safely remove the USB device, go to the tray area and perform “Safely Remove Hardware…”.
4. Unlocking and Locking Encrypted Drives with tCrypt2Go – Standard User Guide – Mac
In this section, the method for unlocking encrypted portable drive under Mac OS X is introduced.× Note: For Mac OS X, it is optimal if TrueCrypt is installed. (For TrueCrypt encrypted partition, this is a must; for TrueCrypt container, it is still recommended to install TrueCrypt.)
× Reminder: Under default configuration, Mac OS X can only read but not write to NTFS file systems; if write is required, please format your portable drive as FAT32 or exFAT according to configuration guide.
a. Insert portable drive (encrypted according to tCrypt2Go/vCrypt2Go configuration guide). Run Finder.
b. Click the volume on the left pane (usually named UNPROTECTED) [1]; execute “Unlock” on the right. [2]c. On first use, a message like the below will be prompted. Click OK to install TrueCrypt or VeraCrypt. (If required, acquire approval from IT.)
Note: Mac OS X behaves differently from Windows, where TrueCrypt must be installed in order to mount encrypted partitions (not encrypted containers) even if admin privileges are available
× If this is not the first time of use, or TrueCrypt/VeraCrypt is already installed, skip to Step 11
d. Installation method of TrueCrypt (similarly for VeraCrypt) will be introduced as follows.
After clicking OK, another Finder window will be prompted, presenting the installer. Double-click the installer.
× In addition, TrueCrypt and VeraCrypt installers can be acquired respectively from:
- http://www.truecrypt71a.com and http://www.veracrypt.fr
e. Click Accept to accept the end-user licensing agreement.
f. Double-click the installer presented.g. Click Continue to continue installation.
h. Click Install to begin installation.
i. Enter admin credentials.
j. When done successfully, click Close to exit.
k. Now, with TrueCrypt/VeraCrypt installed, we can unlock protected area by double-clicking “Unlock”.
In Finder, click UNPROTECTED on the left pane [1]; click Unlock on the right. [2]
l. Enter TrueCrypt/VeraCrypt password to unlock protected area.
m. If the below “administrator privileges required” dialog is prompted, enter the admin password.
n. In case TrueCrypt/VeraCrypt fails to obtain administrator privileges, you may (ask an IT admin to) refer to “Granting Non-Admin Mac Users TrueCrypt/VeraCrypt Right (by Editing /etc/sudoer)” section in the configuration guide.
o. Now, try accessing data in the encrypted area.
Execute Finder again. There will be an additional partition on the left (usually named PROTECTED). Double-click the drive. Feel free to read or write there and your data will be encrypted.
× Reminder: Under default configuration, Mac OS X can only read but not write to NTFS file systems; if write is required, please format your portable drive as FAT32 or exFAT according to configuration guide.
p. After use, double-click “Lock” to lock the protected area. Before unplugging device, click the
q. At times, the below warning is prompted after unplugging device. Click Ignore.
List of Articles on tCrypt2Go/vCrypt2Go
- Introducing tCrypt2Go and vCrypt2Go – Lock-and-Unlock Utilities for TrueCrypt and VeraCrypt Portable
- Technical Overview – How tCrypt2Go and vCrypt2Go work
- Installation Guide – Setting up tCrypt2Go and vCrypt2Go to Encrypt Portable Hard Disks
- Installation Guide – Setting up tCrypt2Go and vCrypt2Go to Encrypt USB Thumb Drives
- *You Are Here* User Guide – How to Unlock and Lock Encrypted Drives using tCrypt2Go or vCrypt2Go
- Enhancing and Troubleshooting Common Issues with tCrypt2Go or vCrypt2Go
Welcome to support this project by buying a cup of coffee ☕ if this tool is useful to you. 😊 Thanks!
Comments
Post a Comment